Category Archives: Uncategorized

September and October 2012: The Return to Hachijojima, Japan

Saturday September 15th, Sunday September 16th, Saturday October 6th and Sunday October 7th 2012

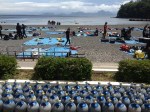
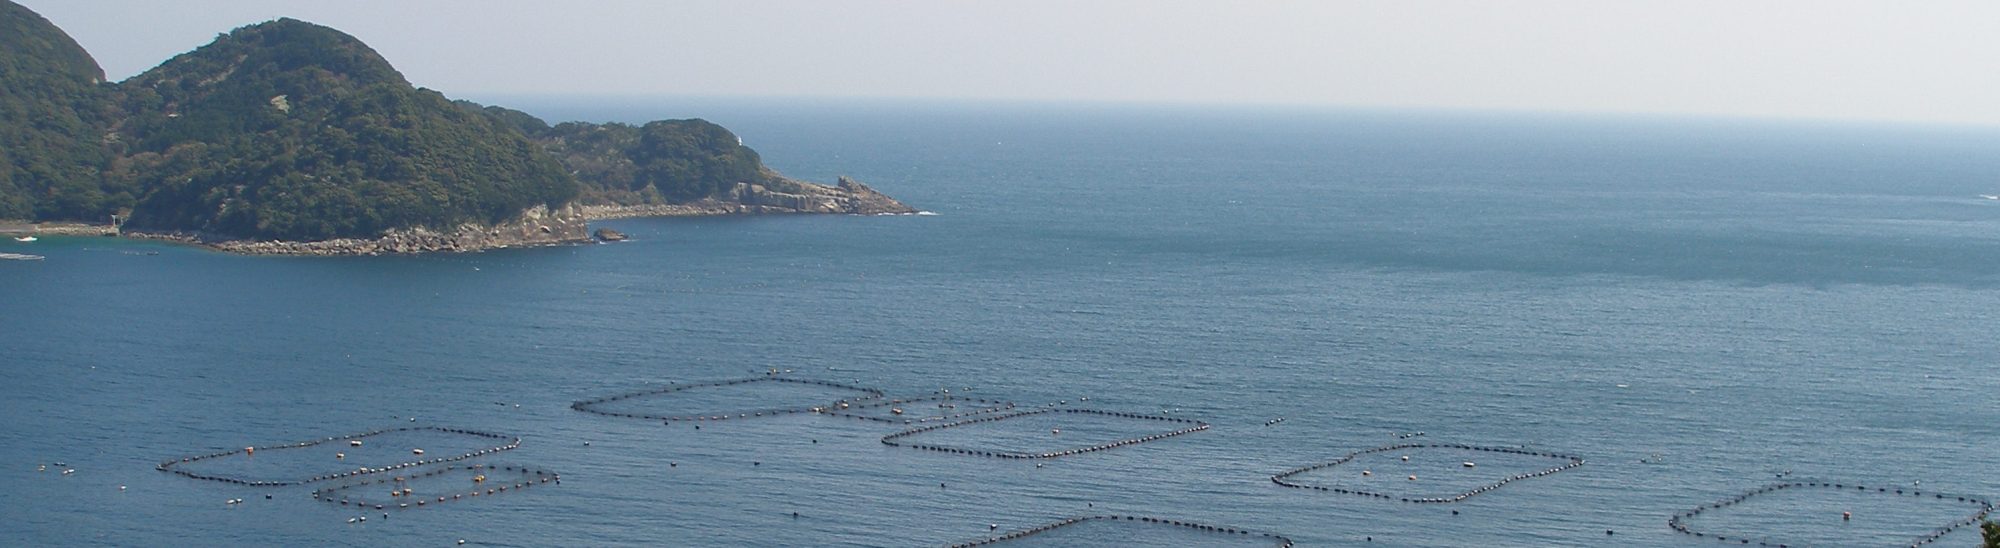
As the overnight ferry from Tokyo makes its 12 hour journey to Hachijojima, the sight of Hachijo-fuji, a tiny Mt Fuji rising up in the distance, is the first sign that the ferry is about to reach its destination.  Hachijojima, a quaint little island of around 8,500 people, is mountainous and volcanic with black sandy beaches, warm sea temperatures and a beautiful and diverse marine life with plenty of sea turtles.  It’s a popular destination in September and October as the sea is still warm and there are a couple of long public holiday weekends in both months.

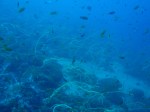
A few seconds’ drive from the port is the dive school Regulus Diving.  Information is readily available there on the dive spots along both sides of the island, while boat dives can be easily arranged for 4,000yen per person.  One site next to the port is Sokodo, a good place if you have not been in the water for a while.  Home to a collection of hard and soft corals, the highlight of Sokodo is a triple arch, a gigantic rocky structure full of tunnels and crevices that runs almost up to the surface and is teeming with marine life and interesting routes to swim through.  Maximum depth is somewhere between 12m and 24m, making it ideal for all levels.  After entering the water down some slippery steps, you are soon in a sheltered bay around 3m deep.  From here, a straightforward swim past some concrete boulders leads to the triple arch.  As the dive begins, the bottom is mainly rocky and visibility can be poor but the complex arch formed by the eruptions of two now-extinct volcanoes is home to many – banded boarheads peering up at us with huge eyes, angelfish, parrotfish, trumpet fish, Moorish Idols and for the more observant divers or digital photo buffs, there are nudibranchs, sea urchins and sea slugs to photograph.   Cornet fish, chicken grunt fish, sea bream and oriental butterfly fish can be seen as well.

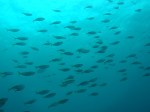
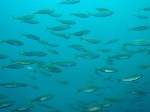
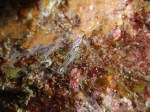
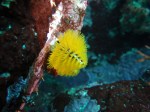
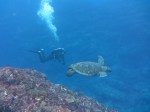
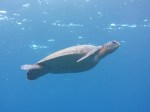
Another popular site about 30mins from Regulus Diving is Nazumado.  Like Sokodo it is a beach entry but getting into the water is challenging if conditions are choppy.  The spot is famous for the Yuzen (Wrought Iron Butterfly Fish) that is only found in Hachijojima and areas further south.  After gearing up at the car park, divers walk down a concrete slippery slope and enter the water holding a rope fixed to the ground.  To do this smoothly, put on your mask, insert your mouthpiece and walk backwards with your BC fully inflated and your fins hanging from your wrist by their straps.  Once in the water and away from all the commotion, you can put on your fins and adjust/clean your mask while floating.  As the dive begins, all the effort is worth it – a 240 degree heading leads to a huge rocky ledge called Umanone with an arch in the middle.  It’s possible to swim through, but turning left and heading to the other side brings you to Christmas tree worms on the rocks opening and closing, an octopus hiding away and a few nudibranchs.  Moray eels roam in and out of random holes searching for food.  But the most fun is exploring the deep crevices, cracks, and wall formations that have built up through centuries.  With the ledge now on our right, we swam down to about 22m but as the current was quite strong, we returned to the arch at around 11m. Through it, we found some small red soldier fish and one or two lionfish close by.  In Nazumado there is plenty of life – banded boarheads, yellow trumpet fish, golden spadefish, moray eels and loggerhead turtles. In addition to the array of macrolife, Green sea turtles swim over the rocks and arches while hammerheads and thresher sharks are known to appear mainly between May and July.

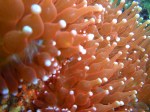
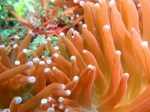
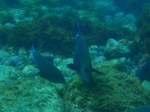
In October the weather turned colder and wetter, forcing us to spend more time in Yaene, another of Hachijojima’s popular spots.  Located on the west coast, this site is sheltered with less waves and surge and a much easier entry/exit, either down a ladder or by giant stride.  The shallow parts are enclosed by a couple of concrete piers and a few boulders, while out in the open sea straight ahead, currents are stronger and seas rougher.  The macrolife in Yaene is varied but the arches are not as spectacular as Sokodo or Nazumado.  Once in the bay and ready to go, a 180 degree heading and a 15-20min swim takes you to an archway.  The bottom is quite sandy to begin with, at 6-7m down, but soon more concrete boulders (teeming with lobsters during the night) and rock gardens come into view at around 12m, and some friendly and curious giant snappers that accompanied us for most of the dive.  There is not much coral, but some of the rocky boulders are huge, like walls rising above for miles and miles.  Swimming over one, we came across 3 giant turtles grazing and swimming slowly by.  The area is also home to juvenile angel fish, yellow trumpet fish, and schools of barracuda type species.   A right turn at the archway is home to an incredible nest of clownfish, a wall of rock covered in huge anemones that house millions of dark-colored babies with the adults trying to attack as we took photos.  Further on from here, it’s possible to enter the archway from the other side and up again over the many huge rocks where divers can spend some time at 7-8m simply watching the turtles.

Diving in Japan in September and October can sometimes be tricky due to typhoons.  This year we dodged several to spend a good deal of time at Hachijojima, but were nevertheless affected by rain, currents and swell.  As some dive sites suddenly close when the weather worsens, it’s a good idea to stay in regular touch with the dive school and look into the possibility of boat dives.  Hachijojima has many sites out in the open sea, usually a short 10-15min journey if that.  Here are some places we visited:

Metto Asane: A backward roll is the start of an immediate descent over a bed of rocks. Once below, at around 10m, is a huge pinnacle where 30-40mins can be spent simply swimming around that before making an ascent.  Close to the pinnacle are some interesting rock formations and small arches to swim through and around.  There is not much coral apart from some sprawling table corals and high-rise coral heads, but the colossal rocks rise up for miles and miles.  The site is home to batfish, stonefish, damsel fish and cleaner fish among others.

Aozumi:  This site is a garden of massive rock formations.  Most are very cliff-like with ridges and are ideal environments for turtles to rest in and hide away.  We were lucky enough to get extremely close to a huge sleeping adult.  Opening his eyes slowly to take a look at us, he was soon fast asleep again and didn’t seem to mind us passing by.  A curious batfish followed us throughout the dive.  Batfish eat turtle faeces, hardly surprising that he was just as keen as us to get close to the turtles.

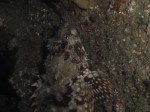
Suzunoyo:  10m down is a huge floor of rocks and flat coral.  From here we swam with a big rocky ledge to our left that was full of marine life.  The bottom of this ledge is dark and full of small openings, cracks, crevices and concealed spots.  Shining a torch through these reveals a variety of fish, crabs, sea anemones, clear shrimp and small pufferfish.  The ledge stays on the left as the dive continues, and ends at around 22m while to the right are pebbles, sand and rocks.  The site is home to the Yuzen, rays that hunt for food in the sand plains, schools of red soldier fish and lionfish living in the darker sections.

(Thanks to fellow diver Alex who let me use some of his photos for this entry).

Practical information

Please refer to my entry written in October 2011 for practical information on getting to and from Hachijojima, costs and dive school facilities.

September’s dives

Dive1: Sokodo: depth: 13.6m, dive time: 56mins, water temp:28C, average depth: 8.7m , entry time: 11:54AM, exit time: 12:50PM, used a 12L tank, 5mm wetsuit and 2kg weights.  Start pressure: 190 bar, End pressure: 40 bar Saw sea bream, Moorish Idols, trumpet fish and a range of other tropical species.

Dive 2: Nazumado: depth: 13.7m, dive time: 42mins, water temp: 27C, average depth: 8.7m,  entry time: 16:14, exit time: 16:56, used a 12L tank, 5mm wetsuit and 2kg weights.  Start pressure: 200 bar, End pressure: 90 bar.  Saw yuzen, about 4 or 5 turtles and an incredible white nudibranch resting on a rock.

Dive 3: Metto Asane: depth: 19.8m, dive time: 38mins, water temp: 28C, average depth: 12.1m, entry time: 11:20AM, exit time: 11:58AM, used a 12L tank, 5mm wetsuit, 3mm hood/vest and 2kg weights.  Start pressure: 170 bar, End pressure: 20 bar.  Saw batfish, stonefish, damsel fish, cleaner fish and porcupine fish.

Dive 4: Aozumi: depth: 15.3m, dive time: 41mins, water temp: 28C, average depth: 10.8m, entry time: 15:11, exit time: 15:52, used a 12L tank, 5mm wetsuit, 3mm hood/vest and 2kg weights.  Start pressure: 180 bar, End pressure: 40 bar.  Saw banner fish, trumpet fish, lion fish, batfish, butterfly fish, parrotfish and trigger fish.

 October’s dives

Dive 1: Suzunoyo: depth: 21.2m, dive time: 50mins, water temp: 25C, entry time: 11:29AM, exit time: 12:09, average depth:  14.5m, used a 12L tank, 5mm wetsuit, 3mm hood/vest and 1kg weight. Start pressure: 200 bar, End pressure: 80 bar.  Saw the famous yuzen, one medium-sized ray, lion fish and a school of red soldier fish.

Dive 2: Kamanoshita: depth: 19.6m, dive time: 51mins, water temp: 25C, entry time: 14:41, exit time: 15:21, average depth: 13.2m, used a 12L tank, 5mm wetsuit, 3mm hood/vest and 1kg weight.  Start pressure: 190 bar, End pressure: 40 bar.

Dive 3: Nazumado: depth: 24.1m, dive time: 44mins, water temp: 25C, entry time: 09:30AM, exit time: 10:14AM, average depth: 11.3m, used a 12L tank, 5mm wetsuit, 3mm hood/vest and 1kg weights.  Start pressure: 190 bar, End pressure: 50 bar.  Saw an octopus, 2 nudibranchs, christmas tree worms and turtles.

Dive 4: Yaene: depth: 15.4m, dive time: 57mins, water temp: 25C, entry time: 11:53AM, exit time: 12:50, average depth: 9.5m, used a 12L tank, 5mm wetsuit, 3mm hood/vest and 1kg weights.  Start pressure: 190 bar, End pressure: 50 bar.  Saw giant snappers, 3 grazing turtles, and an unusual white nudibranch.

Dive 5: Yaene: depth: 18.2m, dive time: 58mins, water temp: 23C, entry time: 15:03, exit time: 16:01, average depth: 10.6m, used a 12L tank, 5mm wetsuit, 3mm hood/vest and 1kg weights.  Start pressure: 180 bar, End pressure: 40 bar.  Saw a nest of clownfish with huge anemones and tiny dark babies living inside, with the adults further away slightly for protection.

Dive 6: Yaene: depth: 22.9m, dive time: 44mins, water temp: 24-25C, entry time: 18:17, exit time: 18:50, average depth: 13.3m, used a 12L tank, 5mm wetsuit, 3mm hood/vest and 1kg weight.  Start pressure: 190 bar, End pressure: 40 bar: Saw lobsters, a banded boarhead trapped in a fishing net, puffer fish and catfish.

August 2012: The Chinsen, Atami, Shizuoka Prefecture, Japan

Saturday August 25th 2012

Atami is 40 minutes away from Tokyo by bullet train, and isn’t really considered a dive destination.  Much more famous for being a hot spring town (Atami means “hot ocean”), volcanic water pumps up from the ground in many locations.  The town is certainly not the first place that comes to mind when looking for somewhere to dive, but there is actually much more to the sea than we think.  Soft corals, octopus, nudibranchs, and a variety of fish have all been spotted at the town’s two main dive sites and one of the only divable wrecks, the Chinsen or quite literally “shipwreck,” can be found here too.  The Chinsen’s real name was actually the Asahi Maru, a barge that sank some 20 years ago in a typhoon.  The typhoon was so strong that the barge split in two, and it now lies in two parts about 15m apart, at a depth of around 25-30m.  It is considered a spot for certified advanced divers firstly because of its depth, and also because there can be slight currents at the surface and entry is off a boat and down a long rope with nothing to see until the wreck appears.  For a diver more used to shore entries and being surrounded by rocks and coral during a descent, such an entry can be a little daunting.

We began with a warm up dive at Soudaine, one of Atami’s main dive sites.  After a short 10min boat journey and backward roll entry, there are some famous rock pinnacles that lead down to around 40m.  At just over 23m, we turned left next to one huge wide rock covered with anemones and soft coral.  Taking a right turn around this rock, we ascended slightly and soon came into warmer waters.  Here visibility was much better and looking up it’s possible to see several pinnacles stretching towards the surface.  These are clustered together and from deeper depths it’s like looking up at several large mountains or valleys.  The entire area was teeming with fish and several moray eels darting here and there.  Visibility was excellent, but unfortunately the current was strong and the remainder of the dive became a drift dive as we returned the way we came, clambering over the rocks towards the ascent point.

We kept these conditions in mind as we headed to the Chinsen.  Part of my Advanced training, the wreck is north of Soudaine and next to Bitagane, another main dive site of impressive walls leading down to 40m, and teeming with anemones, clown fish (at 20m or so), moray eels, amberjack, Moorish Idols and many others.  The descent is down a long rope connected to a single buoy, and the Chinsen comes into view at around 21m.  It’s an 85m-long barge split in two, and the dive begins with the hulk and front area.  The key to diving the Chinsen is to go slightly deeper so you are at the side of the boat and not over it.  At 25m, with a torch at hand, many discoveries await.  Moray eels nest in the nooks and crannies, Margarita basslets and halflined cardinals swim by, and sea fans grip the surface of the wreck, which is also 100% packed with sponges, nudibranchs and spider crabs.  The wreck itself is very easy to navigate.  We turned at a 45 degree heading and followed the sides until the back of the wreck. From here, simply follow the structure which eventually leads back to the starting point.  The current is mild but noticeable so it’s important to stay close to the wreck.  Directly below the rope and entry point is a garden of soft coral, and home to schools of fish that dart by as a torch is shined over them.

The Chinsen has many holes, entrances and pathways through which penetration is possible, but when doing so, depth and time spent underwater must always be remembered.  There is also the risk of getting tangled in something or running low on air as exploring the wreck becomes the diver’s main focus.  Loose parts can also fall if there is any kind of disturbance, for example rigorous fin kicking or air bubbles, which is why divers are highly recommended to train first before attempting to enter a wreck.  As the Chinsen is relatively deep, it’s also important to know your rock bottom pressure, turnaround pressure (to be discussed with your buddy), and make the required safety stops along the rope as you ascend.

As beautiful as a dive site may be, the ocean is perilous and scuba diving carries with it some inherent risks.  The Chinsen is no exception, but although it’s a site for advanced divers, an experienced Open Water diver could cope with the conditions.  Many people think of scuba diving in warm tropical locations, but within easy access from Tokyo are some beautiful dive sites in terms of biodiversity.  Atami, The Chinsen and other sites I have explored this summer, really are some well-kept secrets of Japan’s diving world.

Practical information

  • To get to Atami, take the Shinkansen bullet train from either Tokyo or Shinagawa stations.  The early morning train from Shinagawa leaves at 7:34 (destination Nagoya) and arrives at Atami around 8:12.  A single ticket with non-reserved seat costs around 3500yen.  It’s advisable to arrive around 8AM to have a full day of diving.
  • My dive group picked us up and took us to Atami Scuba (www.atamiscuba.jp), a 5-7min drive from Atami station.  The school is right on the port, with hot showers and toilets, a vending machine by the reception (500 ml bottle of water 150yen), and a fairly large area with benches and picnic tables for barbecues and for hanging equipment.  No tea, coffee and snacks are provided so remember to prepare some. There is no convenience store near the dive school, only a couple near the station which is up a hill and difficult to get to.  Barbecue was offered by my dive group.
  • The boat leaves for the first dive between 10 and 10:30.  After arriving, getting equipment and being shown around the facilities, it’s best to start gearing up right away.  Everyone puts on their equipment and walks on to the boat to sit on the floor.  Entry into the water is a backward roll.
  • After the first dive there is usually a 1.5 to 2 hour break, before the next dive begins in the early afternoon, around 13:30 or 14:00.
  • Two boat dives cost 15,000yen (rental gear separate).  The group barbecue is 1200yen.  Train tickets and any overnight stay in Atami are not included.
  • All divers are responsible for setting up their equipment, washing it and tidying up after each dive.  Heavy suitcases containing diving equipment can be left in the shower rooms for those staying overnight.

August’s dives

Dive 1: Sodaine: depth: 24.7m, dive time: 30mins, water temp: 23C, entry time: 10:55, exit time: 11:25, average depth: 14.2m, used a 12L tank, 5kg weights (2kg in belt and 3kg metal plate) and 5mm wetsuit.  Start pressure: 190 bar, end pressure: 40 bar.  Saw soft coral, Moorish Idols, moray eels and various nudibranchs.

Dive 2: The Chinsen: depth: 27.8m, dive time: 29mins, water temp: 23C, entry time: 13:41, exit time: 14:10, average depth: 16.8m, used a 12L tank, 5kg weights (2kg in belt and 3kg metal plate), and 5mm wetsuit.  Start pressure: 180 bar, end pressure: 40 bar.  Saw margarita basslets, halflined cardinals, more soft coral, anemones, and amberjack.

August 2012: Izu Ocean Park (IOP), Izu Kogen, Shizuoka, Japan

Wednesday August 15th 2012

Sandwiched between the Sea of Japan and the Pacific Ocean, Japan is a surprise in store for many divers.  The country’s main islands and smaller ones are scattered across the archipelago, making conditions ideal from ice flows up north to tropical waters down south.  As summer approaches, warm currents flow along the islands south of Tokyo while in winter a cold current brings icy waters south from the Arctic ocean.   All this means that divers can experience the crystal clear blue waters of Okinawa, the cold waters of Hokkaido, tropical coral reefs, kelp forests and even ice diving all in one year.

Since 2011 I’ve been coming across new dive sites in Japan and today visited another, Izu Ocean Park or more commonly known as IOP.  The park was one of the very first sites to be explored years ago around 1965 and is a 15-min bus ride away from the nearest station.  Situated in the middle of a beach, it’s dotted with swimming pools and ample facilities for scuba diving, while the palm trees create a nice warm summery atmosphere.

Our dive school Little Ritz picked us up from the station and drove us to their shop 5 mins away.  The shop is a place to prepare equipment, sign wavers and collect rental gear before being driven to Izu Ocean Park itself, around 15mins away by car.  In summer, crowds of divers flock to the area and today was no exception.   The main road into the park takes you past rows and rows of picnic tables, another huge dive school (IOP Diving Center), swimming pools containing sea water, a massive outdoor bath, shower, and changing room area with lockers, and a smaller building slightly further away with a freezer and ice available to store food and drink.  Although the area is busy, all facilities are easily accessible and there are nearby stalls selling noodles, ice cream and basic drinks.

Tanks are available at a separate area downhill from the picnic tables and near the entry point, so we walked down carrying all our equipment to set up by the water.  Izu Ocean Park has two main dive sites, the left beach and right beach.  The left beach is the most well-known for its diverse marine life and goes down to around 18m making it ideal for Open Water divers and beginners.  Angelfish, rock fish, lion fish and damsel fish are often spotted there.  For the more advanced, the right beach tapers down to between 28m and 32m.  A rocky area leads out to one underwater pinnacle with several nice forms of soft coral.  Having put on all gear, divers then follow a rope into the water wearing their mask and fins, forming a long queue as each enters the water one by one.  The sea can be very choppy and the rocks are slippery so it’s vital to hold onto the rope which remains until it is safe and comfortable enough to start swimming out.  A buoy further away acts as a good meeting point, and from there the descent takes you to about 4m, where plenty of rocks lie below.

The rocks are covered in seaweed and all sorts of life.  It is not tropical here by any means, but the waves and water movement can be fairly strong, washing away any sand and sediment and leaving excellent visibility.  Blue heavenly damsel fish, or neon damsel fish, swim over the rocks and in between the holes and cracks.  Half-lined cardinal fish, spotnape cardinal fish whitelined goat fish and scalpel sawtails are all known to live here.  Some rocks are tall, huge and almost boulder-like, providing ample space to swim around and look out for nudibranchs, small anemones, sea slugs, shrimps and crabs which can be easily found by shining a torch into the gaps.   Divers can get hidden away behind the rocks, and becoming separated from others can happen easily depending on how absorbed you are by the area, but the buoy is always something to look out for and a good marker by which to ascend if required.

The rocks remain over a considerable area, but as the water becomes deeper at around 8-10m, they suddenly turn into a considerable dropoff.  Here, visibility is a lot worse due to the sandy bottom, but all sorts of creatures thrive such as Christmas tree worms and camel shrimps at 12m.  Further down at 20m the area becomes sandy and from here it’s sand all the way to the dark depths.  With the rocks behind and slightly poor visibility, all there is is sand and one simple rope on which is a small postbox.  This is the highlight of the site.  The dive shop will laminate postcards which you can quite literally post, at 20m down.  Beyond the postbox is a medium-sized artificial cluster of plants which have been deliberately placed there for squid to lay their eggs.  Although it’s slightly late for this time of year (egg-laying season is around May), they are still being drawn to the warmer waters of the Izu Peninsula and we were able to sit and observe them from a distance.  The eggs are deposited onto the plant inside an egg case.  Many other squid lay in the same area, which is why eggs are often found in clusters.  They are usually laid only once as both the male and female will die soon after.

We took a slightly different route on the ascent over some more boulders and spent time exploring these.  Here the water tends to be rougher and controlling buoyancy on an emptier tank in such conditions is a bit more challenging but there is still plenty to see.  We came across an orange sea slug laying eggs, buried in a cluster of seaweed, and nudibranchs (Hypselodoris maritima and Ceratosoma trilobatum) holding fast to a rock.  During the ascent the rocks get bigger and spread out more, and visibility improves until you are back at around 5m where the dive began.  On the way up we also came across a school of horse mackerel, said to be extremely common in the area and particularly so at this time of year.

Despite the warm waters, Izu Ocean Park is best avoided at weekends and holidays when the crowds flock to the dive centre.  On weekdays there are likely to be fewer (and perhaps more experienced) divers, while of course there is much more to see when there are less people underwater.  At first glance, IOP is a very basic dive site and not the most exciting, but one that I definitely wouldn’t mind exploring again.

Practical information

  • Take the Shinkansen bullet train to Atami from either Tokyo or Shinagawa stations.  The early morning train from Shinagawa leaves at 7:34 (destination Nagoya) and arrives at Atami around 8:12.  A single ticket with non-reserved seat costs around 3500yen.
  • From Atami, take the Izu Kyuko line to Jyogasaki Kaigan station.  The journey is around 54mins and costs 880yen for a single ticket.
  • Our dive shop Little Ritz (http://miyagino.biz/) came to meet us at the station and drove us to the shop about 5mins away.  Here we could organize equipment, work out what we needed, pick up any rental gear, have coffee and get ready.  The shop is also a place for writing up log books, looking at photos and buying things like books on marine life.
  • Little Ritz then drove us to Izu Ocean Park (with a stop at the nearest convenience store to buy snacks and lunch) which is about 15mins away.  The park’s main dive shop is the IOP Diving Center (http://www.iop-dc.jp/index.html) which sells books, tiny items like pens or waterproof bags, and postcards which they will laminate so you can post them at 20m.  One postcard including lamination costs 100yen.  Outside the shop is a huge area of parasols and picnic tables.
  • We chose a couple of picnic tables and set out our bags and equipment.  Nearby are salt water swimming pools, a shop selling noodles, ice cream and soft drinks, a bath (do not enter wearing a wetsuit!), six or so showers, indoor shower area with lockers, and toilets.  You can also get changed into your wetsuit in this area.
  • The tanks can be found down the hill from the picnic tables.  Carrying all our equipment and wearing our wetsuits, we walked down to that area which is right next to the entry point.  Here, you pick up a tank and set everything up.
  • Entry is along a rope by foot.  Wearing all equipment including mask, fins and mouthpiece, walk facing the rocks and holding on to the rope.  The water is choppy, the ground is slippery, and when there is a queue of divers, entry can be extremely slow.
  • Ascend along another rope directly opposite the entry point.  Hold onto the rope and when it gets shallower, pull yourself up and walk back along the slippery ground.  Once it is safe to do so, remove mask, fins and mouthpiece, and finally equipment.  After swapping the tanks, all equipment can be left there while you take a break.
  • Little Ritz provides tea but no snacks or lunch so remember to prepare this beforehand!  Lunch is usually eaten between the first and second dives.
  • All divers are responsible for their own equipment.  Up the small hill from the entry point is an area to wash BCs, regs, fins, masks and snorkels.  Wetsuits, vests and hoods can be washed in a shower and hung close to the picnic tables.  All equipment is usually brought back and hung close by.
  • Two beach dives cost 12,500yen (rental equipment separate).  Any additional dive is 5,000yen per dive.  Renting full equipment costs 4,000yen, mask and snorkel 500yen each, fin and boots 500yen each, wetsuit 2000yen, reg 1000yen, BC 1000yen.

August’s dives

Dive 1: IOP: depth: 11.1m, dive time: 52mins, water temp: 23C, entry time: 11:07, exit time: 11:59, average depth: 4.7m, used a 10L steel tank, 2kg weights, 5mm wetsuit, 2-3mm hood/vest, BC wing.  Start pressure: 200 bar, end pressure: 80 bar.  Saw cardinal fish, sawtails, nudibranchs, anemones, camel shrimps and crabs.

Dive 2: IOP: depth: 20.2m, dive time: 45mins, water temp: 23C, entry time: 13:14, exit time: 14:00, average depth: 11.6m, used a 10L steel tank, 2kg weights, 5mm wetsuit, 2-3mm hood/vest, BC wing.  Start pressure 190 bar, end pressure: 40 bar.  Saw squid laying eggs, an orange sea slug laying eggs, horse mackerel and two types of nudibranch.

July and August 2012: Osezaki and Oshima, Japan

Saturday July 14th, Sunday July 15th, Saturday July 21st, Sunday July 22nd, Saturday August 4th and Sunday August 5th 2012

Divers often visit Osezaki and Oshima for fun and for training.  This year as part of my Advanced, I have spent a considerable amount of time at both.  One is a bay, the other an island, and each offer an excellent range of sites where various skills can be practiced and put to use.  Here’s a description of two of my dive group’s most visited destinations.

Osezaki faces out into Suruga Bay, which is small and open, but also one of the deepest bays in Japan at around 2500m with approximately 1000 kinds of fish.  The area crowded with divers in summer is a wide beach with several dive shops, restaurants and inns in the background.  Divers pick a spot, lay out picnic sheets and set up equipment before walking into the water.  The bay is sheltered and the sea is calm, making it ideal for first-time divers or training purposes.   It stays shallow, horizontal, pebbly and rocky for quite a stretch but when visibility is good, you can see seaweed stuck to the rocks and an array of fish darting around below.  After a while you come to a stretch of concrete boulders at around 5m, where there is a slight drop down to around 8m.  From then on, the bottom is sandy and muddy and spreads out towards the deeper depths.  With no more drop offs, you are free to swim out into the unknown.

The reason why people head to Osezaki to get certified or work on more Advanced techniques is that the bay has plenty of areas that are simply well suited for practicing particular skills.   The concrete boulders are home to millions of sea urchins, and an excellent place to practice buoyancy.  Located at 5m, it is there that divers must do their 3-min safety stop during an ascent so remaining horizontal and still is vital, even more so at night when millions of sea urchins are directly below.  Deeper sandy areas also require good buoyancy control as it can be easy to stir up the sand and reduce visibility in such parts.  The bay also houses a collection of objects, some linked together by ropes and others that have been put there such as car tires, a motorbike, a Winnie the Pooh object, mini shrine and bathtub.  This means that the bay’s underwater map is detailed and full of information for dive planning and navigation.  During a navigational dive or search and recovery practice, it’s good to keep an image of the map in mind and follow the ropes until arriving at a particular item but others objects that aren’t connected together can make things more challenging.  An SMB can be launched at any time, and various buoys are attached to the bottom by ropes, which is a good chance to practice an ascent and safety stop, but remaining horizontal and trying not to touch the rope or nearby rocks.    The deepest dives are around 30m – 40m, while night diving offers hundreds of moray eels, a baby octopus crawling along a rope, shrimps, and huge sea bass that can be curious and follow divers around.  For more advanced fun diving, places outside the bay such as Ipponmatsu and Sentan (the Point) are good recommendations.  These are not as sheltered, but have excellent deep drop offs that stretch down to some whip coral at a little over 20m.  Both are quite rocky and pebbly, but lifting up the odd rock here and there will reveal some interesting marine life.

Oshima is immediately south of Tokyo Bay and can be reached overnight from the Takeshiba port terminal.  The island doesn’t fill people with joy as a possible holiday destination and certainly isn’t glamorous but the diving is.  Akinohama is one of the main sites on the island.  A path from the car park leads to some gigantic rocks sticking out into the sea, where a giant stride entry takes you  into water that is 4-5m deep.  There can be a lot of swell at the surface or a slight current so it’s important to quickly head below, over a huge area of massive rocks covered in seaweed, shellfish, spider crabs, and box fish.  A good place for deep and night dives, the rocks continue on down to 20m – 40m and beyond, where you can find some incredible soft coral.   Nodahama, another dive site, is reasonably shallow and famous for its rock formations including Fish TV where fish gather at a big arch and divers can hover close by and watch.  After walking down to the beach from the car park carrying all equipment, entry into the water is by foot and can be difficult in rougher seas as you scramble over the rocks but there are ropes to hold and the area is shallow enough to sit down and put on fins and masks.  Once in the water, all it takes is to swim downwards along a slight slope, where the rocks get bigger and more wall-like, providing some good places for photography and observation.  It’s also possible to swim through Fish TV itself.  This route takes you out through more rocks and boulders with stinging hydroids (don’t forget gloves!) and some beautiful nudibranchs.  Keikai is another shallow dive spot but can have strong currents and navigation is particularly difficult due to a series of rocky ridges.  Divers put on their equipment at the car park and walk down to the beach, but the area is much more rocky and with the swell at the surface it is important to be ready and able to get into the water straight away.  The rocks become huge and maze-like almost immediately and down at around 10m-15m there are some beautiful parts including a wall covered in red anemones and clownfish.

See my entries of August 2011 (Oshima) and June 2012 (Osezaki) for practical information on how to get to these areas and the dive schools available.


July 2012: How to launch an SMB and a few other “Advanced” techniques, Yugawara Pool, Shizuoka, Japan

Saturday July 7th and Sunday July 8th 2012

The SMB, or Surface Marker Buoy, is a fascinating device to use and an integral part of being an Advanced diver.  Also known as a Safety Sausage, its role is to mark divers’ positions underwater so that boats know where the divers are, can pick them up, and show other boats that there are divers below.  The SMB comes with a spool which is locked with a small clip.  The whole thing can be fastened to a BC or kept in a BC pocket.  Deploying it is fun, but does take some practice.   To begin, unclip the SMB from your BC and unlock the spool.  The small clip is then attached back on your BC, and your next task is to unreel a little bit of the string around the spool.  Look around and make sure there is nothing above, below or around that could become entangled in the string.  Next, keep the spool and SMB in one hand, and inflate.  Depending on the type of SMB, this can be done in various ways – orally, using an alternate air source, or the actual mouthpiece.  The SMB needs to be at least half full in order to stay upright.  Inflate some more and let it rise to the surface, maintaining full control of the spool.  When it reaches above water, keep the string taut by adding some extra tension to make it stay upright, and ascend slowly.  Good buoyancy control is vital for a smooth launch.

Training for the Advanced certification, which I have decided to do slowly over the next several months, consists of many other techniques as well.  As usual, further buoyancy control is a must, but simply achieving that isn’t the end of things.  The checklist for my training says that a diver must never touch the bottom or float to the surface unless they want or need to, and must never disturb the marine life.  Good fin techniques are vital to staying horizontal and maintaining control as you swim along.  Part of the training includes practicing frog kicks, keeping your body and upper legs horizontal but bending your lower legs so the ends of your fins point upwards.  You then twist your ankle and lower leg at a right angle.

Because of limited space and being in a more controlled environment, buoyancy control, frog kicks and launching an SMB are all good skills to start off with in the pool.  During the weekend I used for the first time a type of BC consisting of a back plate and wing, and a long hose regulator.  The back plate is made of metal and attached to the wing using two big straps which then go around your tank.  Both must be fixed tightly to your body, and are great underwater as it feels as though the diver, back plate and wing are “as one.”  Compared to the conventional jacket-style BC, the back plate and wing make it much easier for the diver to stay horizontal as everything is fixed on the back, and less weights are needed around the waist as the metal plate is already considerably heavy.  With the long hose regulator, the regulator for breathing is placed on an extremely long hose as the name suggests, while the spare regulator is attached to a shorter hose and worn over the neck.  When sharing air in an emergency, the diver takes the long hose regulator out of the mouth, gives it to the out-of-air diver, and then uses the spare regulator.  This is another technique easily practiced in the pool.

Navigation is focused on once you begin training in the sea, but rather than being a separate task, it comes up in all dives.  An Advanced diver should always carry a compass, know how to read maps of dive sites and understand how to figure out the heading of each direction they will swim in.  Navigation is also a part of understanding standard dive procedures and being aware, knowing where you are going, any possible landmarks or hazard spots, and where the entry  and exit points are.  Deep diving however is different altogether.  Not only do you go deep (30-40m) but through simple calculations you are required to know your rock bottom pressure (minimum amount of air you need to get you and your buddy to the surface while you are both breathing from one tank in an emergency) and turnaround pressure (the lowest pressure at which you can be when you decide to head back to the ascent point).  Turnaround pressure is difficult to determine as it depends on how the dive goes, how long it takes to reach a destination and how long you want to spend there.  To calculate rock bottom pressure, you need to know how much air you usually consume per minute and this is a good calculation to practice regularly before figuring out your rock bottom pressure.

My checklist also states that in general, an Advanced diver must exhibit good buddy skills and awareness, keep an eye on his or her buddy and understand the conditions in the sea.  An Advanced diver must also evaluate dive logistics and environment, and have the confidence to decide whether to dive or pull out, using his or her skills, experience and readiness.  Above all, he or she must be fully confident to plan and execute dives with a dive buddy.

Being an Advanced diver changes your diving experiences in quite a big way.  Rather than following a guide or having others help out, you are expected to be a lot more independent.  Instead of simply doing the task you are given, like heading down to 30m and then coming back up again, an Advanced diver must have a greater input in his or her experiences underwater. As an Advanced diver, you’re expected to have a lot more say in your dives, and contribute to areas like planning, navigation, amount of air, depth and time spent underwater.  It’s important to have your say, make clear what you are thinking and feeling at the time, and why.  The Advanced has no deadline, and can be taken in a weekend or spread out over several weeks or months.  The reward is some great and fun adventures – night diving, wrecks, experiencing the deep and much more.

June 2012: The Joys of Navigation, Osezaki, Shizuoka, Japan

Saturday June 16th and Sunday June 17th 2012

All dives require a focus on safety, buoyancy, air, buddies and depth.  With poor visibility or currents to consider as well, the underwater environment really is THE place to get lost.   Of course there are no maps and divers are faced with a random terrain of rocks or coral gardens with nothing but blue as they stare ahead.  As training for my Advanced certification begins this summer, one important skill I need to learn is how to navigate.

Before that however, the first thing is to plan your dive.  Here are some things to consider:

  • Location – is it sandy, rocky or full of coral?  Are there wrecks or any small tunnels?
  • Water conditions – is there any current or poor visibility?
  • Divers’ navigational skill and level
  • Dive plan – are the divers planning to head north for 15-20mins, head west and go south?  Or will they move from point to point?  Is there anything in particular they want to see?
  • Map – draw a map on a slate or look at an actual one.  This helps the diver keep a mental picture of the site.  It’s also useful to mark the depths on various points, the entry point or location of the dive boat.   Plan a route.

Underwater compasses have a big lubber line (direction of travel line), a bezel (a movable ring full of numbers around the edge of the compass), a card (the white movable part that says N, S, E and W and full of numbers as well) and a window (a small one at the side of the compass to look through as you swim along).

With the help of some online information, here are some navigation techniques I found:  To navigate using the window, point the lubber line in the direction you want to go, and you will see a number in the window.  As long as the compass is level and the number stays there, you are going where you want.  Before a shore dive, point the compass in the direction you wish to ascend and remember the number in the window so when you are swimming back, you know you are going the right way if you see that particular number.

To navigate using the bezel, point the lubber line in the direction you want to go, and turn your bezel until the double triangle bit is right next to the N on the card.  As you swim, keep the compass flat and steady and make sure the lubber line is pointing towards your destination.  Then you should always see the N next to the double triangle. If not turn slightly until you do.  If the bezel is correctly placed, the number in the window will also be the same as the number at the end of the lubber line.

You and your buddy might decide to descend along an anchor line, and swim at 150 degrees (this number is called the heading) to reach a wreck.  Once you’re at the bottom, turn until you see 150 in the window, or turn your bezel so that 150 is at the far end of the lubber line and turn until the N is in the double triangle of the bezel.  To get back using the bezel, turn until the N is next to the single triangle.  Using the side window, note the number directly across from the direction you were heading in.  The number across from 150 is 330, so if you keep 330 in your window as you swim back, you should get back to that anchor line.

When navigating, it is easy to focus only on the compass and neglect your buddy and what is around you.  To make sure you keep an eye on your buddy and see a few things as well, look at the number in the window (for example 150), make a mental note and take in your surroundings.  It’s okay to swim a little to the left or right if you want to explore something or take photos.  Just remember that number 150 as you head to your destination.

My dive group train at Osezaki Bay in Shizuoka prefecture.  Located on the west side of the Izu Peninsula, the sheltered bay is C-shaped with a long beach full of dive schools, calm waters, a sandy bottom and plenty to see.  All of these make it very popular for dive training.  Further west of the bay are deeper areas full of boulders which you get to by loading up your dive gear on a cart, and heading out on foot.  The bay is particularly good for navigation as it is littered with objects – car tires, small statues, metal structures, a particularly huge concrete boulder, a motorbike, a boat, the list is endless.  Some are joined together by ropes, so to practice simple navigation, the best thing is to pick some objects you want to see and aim to reach them.

My buddy and I planned our dives using a map of the area complete with depth information.  For my first dive, we planned to head past a concrete boulder and follow a rope down to about 20m where we would find some car tires.  After exploring these we would ascend, stopping to look at a small shrine entrance before emerging at the surface.  With a picture of the map in my mind, I reached the car tires but got lost ascending and couldn’t find the shrine.   The deeper areas have no landmarks, so we discussed how deep we should go before turning left or right, and much air we should have when turning back.   I felt like more of a landmark person because I managed to pick out some rocks, whip coral and other features and successfully returned to our entry point, having remembered that we descended over a sandy slope that stood out among the rocks.  On Sunday, poor visibility at 20m completely threw me and I got quite lost but later things improved as I was more familiar with the site.   During the weekend we saw moray eels (including one being cleaned), blue banner fish, an incredible school of sardines (very rare to spot!), purple anemones, stone fish, wrasses, lion fish, sea urchins, catfish, nudibranchs and Moorish Idols.

Navigation sounds intimidating but it needn’t be.  Veering off course or finding something not part of the dive plan are opportunities to discover new sites or creatures, and trying to reach a destination is like a game and fun in itself.  It’s important to turn something that seems complicated into something that is fun, and with practice I’d like to learn more about the joys of navigation as well as the skill itself.

Practical information

  • To get to Osezaki, take the Shinkansen bullet train from either Tokyo or Shinagawa stations.  The early morning one leaves Shinagawa at around 7:34AM (destination Nagoya) and arrives at Mishima station around 8:19AM.  A one-way ticketwith no reservation costs 2,210yen.
  • It takes 12 mins to change trains at Mishima station.  Follow the signs to the Izu Hakone Tetsudo Line (Sunzu Line), destination Shuzenji.  The journey to Izu Nagaoka station is about 20mins and a one-way ticket is 320yen.  One train leaves at 8:31AM and arrives at 8:55AM.
  • At Izu Nagaoka station our dive shop accommodation (Osezaki Marine Service http://www.fuji.ne.jp/~osekan/)offer a pickup around 9:30AM.  It takes around 30mins to Osezaki Bay.
  • The dive shop is located right on the Bay with basic accommodation behind.  It has a big area selling books where people can leave bags, food and drink.  Outside are the tanks, while wetsuits, boots, masks etc for rental are behind the counter.  There are 3 toilets next door along with male showers.  Female showers are up some stairs into the building opposite.
  • Bring your own tea, coffee and snacks to have in between dives.  Hot water is available but cups must be borrowed from the restaurant next door.  Plenty of vending machines selling water, beer and soft drinks.
  • The shop takes a large area of the beach where customers can set up equipment.  You are responsible for everything – changing tanks, cleaning, and making sure everything is kept together.
  • To go to the deeper areas further west, take one of the carts parked nearby, load it with your equipment and head over on foot.
  • As I’d come with my group, there were no guides from the shop to accompany us on our dives, but no doubt this can be arranged for private bookings.
  • Lunch is available at the restaurant next door.  For around 1,000yen you can get basic curry, set meals of rice, miso soup and fish, or noodles.  Coffee is around 300yen.
  • All dives are shore dives, basic beach entry.
  • There are huge containers of water to wash wetsuits, BCs, regs, boots, masks and fins.  These can all be hanged on the rack next to the containers.  Compasses, dive computers, SMBs and cameras can be soaked in a smaller container next to the shop.
  • We stayed in basic accommodation next door to the shop.  One room can sleep at least 3-4 people on the floor.  All rooms are Japanese-style with tatami straw mats.  Dinner and breakfast not provided.  Our group usually has a BBQ.
  • There are no shops in the area so it’s a good idea to stock up on food and drink at the convenience stores close to Izu Nagaoka station.

June’s dives

Dive 1: Osezaki Bay: depth: 19.3m, dive time: 36mins, water temp: 22C, entry time: 11:42, exit time: 12:18, average depth 10.5m, used a 12L tank, 5kg weight belt, 5mm wetsuit and 2-3mm hood/vest, start pressure: 200 bar, end pressure: 65 bar, saw sea urchins, lion fish, moray eels, purple anemones, stone fish, scorpion fish and wrasses.

Dive 2: Sentan, The Point, Osezaki: depth: 21m, dive time: 41mins, water temp: 22C, entry time: 15:10, exit time: 15:51, average depth: 12.6m, used a 12L tank, 5kg weight belt, 5mm wetsuit and 2-3mm hood/vest, start pressure: 200bar, end pressure: 60 bar, saw moray eels, sardines and whip/soft coral.

Dive 3:  Osezaki Bay: depth: 22m, dive time: 34mins, water temp: 22C, entry time: 10:23, exit time: 10:57, average depth:12m, used a 12L tank, 5kg weight belt, 5mm wetsuit and 2-3mm hood/vest, start pressure: 200 bar, end pressure: 60 bar, saw a beautiful butterfly-like fish with wonderful big blue wings.

Dive 4:  Sentan, The Point, Osezaki: depth: 21.4m, dive time: 49mins, water temp: 22C, entry time: 13:08, exit time: 13:57, average depth: 12.2m, used a 12L tank, 5kg weight belt, 5mm wetsuit and 2-3mm hood/vest, start pressure: 200 bar, end pressure: 60 bar, saw nudibranchs, Moorish Idols, great colourful fish actually eating seaweed and the massive school of sardines once again.